
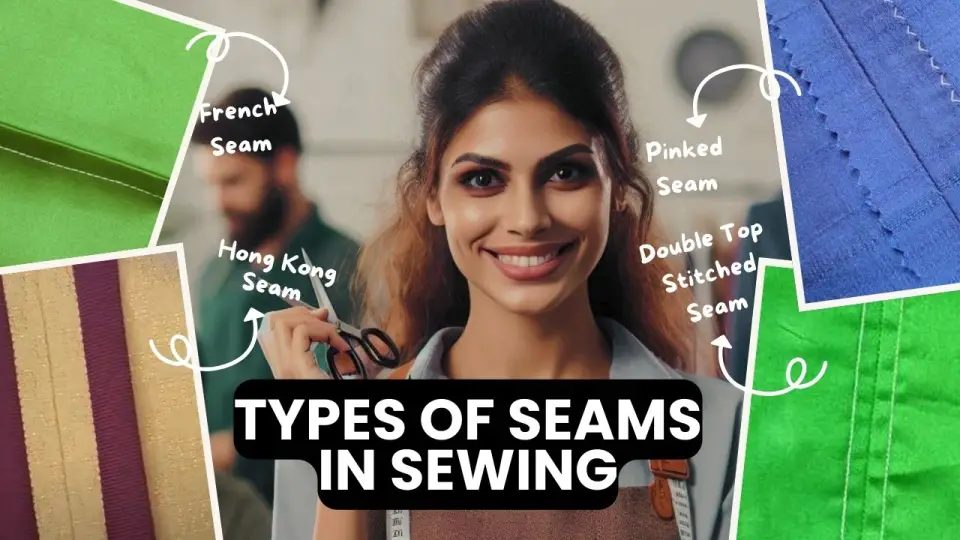
17 Different Types of Seams and Seam Finishes | Complete Sewing Guide
This guide explores 17 different types of seams and seam finishes, from basic options like the plain seam to advanced finishes such as the French seam and bias-bound seam. Each seam is explained with its purpose, technique, and practical applications, making it a valuable resource for sewists of all skill levels.
If you don’t know what a seam means in sewing and want to understand what a seam allowance is, we suggest reading our previous blog post.
Table of Contents
Plain Seam
The Plain Seams are the simplest types of seams. It’s created by stitching two pieces of fabric together with a straight stitch, keeping the distance between the stitching line and the fabric edge the same all the way along. Then, press the seam allowances to open so they lie flat on each side of the seam. This is why the plain seam is also known as the open seam, as the seam allowances are kept open on each side. It is also termed a straight seam, as the seam line will always be straight and parallel to the fabric edge.
To make a plain seam:
- Stitch: Sew the two pieces of fabric together with a straight stitch.
- Press: Press the seam open, or if the fabric is lightweight, trim the seam allowance and press it to one side.
Tips for a Perfect Plain Seam:
- Use Throat Plate Guidelines: Most throat plates have small lines notched to the right of the presser foot. Align the edge of your fabric with the seam guideline on your sewing machine’s throat plate to ensure a straight stitch.
- Fabric Choice: Plain seams work best on fabrics that don’t fray easily, like lightweight to medium-weight cotton, linens, and fine wool.
By following these steps and tips, you can create clean and professional-looking plain seams in your sewing projects.
A plain seam can be divided into three types: a straight seam, a curved seam, and a cornered seam, depending on whether the seam edge is straight, curved, or angled.
Curved Seam
We sew a curved seam when sewing fabric with curved edges, such as armholes or necklines. To achieve a clean and professional finish, the width of the seam allowance must remain consistent throughout. Sewing a curved seam requires careful guidance to ensure the stitching stays at an even distance from the fabric edge.
For better control, using a seam guide and adjusting your sewing machine to a shorter stitch length is helpful. Slowing down the machine speed also makes it easier to handle the curve smoothly, resulting in a precise and neat seam.
Cornered Seam
We sew a cornered seam when a fabric edge forms an angle, i.e., where two straight seam lines meet each other with an angle, we call it a cornered seam. A cornered seam needs reinforcement(reverse stitching) at the angle to strengthen it. This is done by using small stitches (15 to 20 per inch) for 1″ on either side of the corner. It is important to pivot with accuracy when cornered seams are enclosed. For example, the cornered seam is used in a collar. The corners should be blunted for better results when the collar is turned.
Closed Seams
Closed seams are the types of seams where special types of stitches are used to finish the edges of a seam allowance. This type of seam can be achieved in a few different ways, depending on the type of fabric and the desired look.
Another way to create closed seam is by using a serger or overlocker. A serger or overlocker is a specialized type of sewing machine that has multiple threads and blades to trim and finish the edges of the seam allowance. This type of seam is great for fabrics that are lightweight and prone to fraying, as the stitch helps to keep the fabric together and reduce fraying.
Another way to create this type of seam is by using a zigzag stitch. A zigzag stitch is a type of stitch created on a regular sewing machine that overlaps the edges of the seam allowance.
Following are different types of closed seams. There could be many more, depending on the creativity of the sewer.
- Zig-Zag
- Overcast
- French
- Bound Welt
- Lapped
- Run and Fell
- Turned & stitched seam
- Hong-Kong seam
Turned and Stitched Seams
A turned and stitched seam is a type of seam finish where the raw edges of the fabric are folded under and sewn down. This technique creates a neat, durable edge that resists fraying, making it an ideal finish for garments or projects that require a polished interior.
Hong Kong Seam
A Hong Kong seam is a type of seam finishing technique used to encase raw fabric edges with bias tape, creating a neat and durable edge that resists fraying. This finish is achieved by sewing bias tape along the seam allowance, pressing it around the raw edges, and stitching it in place to ensure a clean, flat seam. Unlike traditional bias-bound seams, the raw edge of the bias tape in a Hong Kong seam remains visible on one side, making it less bulky and well-suited to heavier fabrics.
Hong Kong seams work best on medium to heavyweight fabrics, such as wool, denim, or canvas, where traditional serging might be too bulky or cause the seam to unravel. This seam finish is especially popular for unlined jackets, coats, and pants because it gives the garment’s interior a professional and polished appearance without requiring a full lining. Hong Kong seams add strength to seam edges, reducing wear and tear over time. This makes it an excellent choice for garments that will undergo frequent washing or high wear.
Bias Bound Seam
A Bias Bound Seam is a seam finishing technique where a bias-cut fabric strip is used to enclose the raw edges of a seam, creating a clean, durable, and aesthetically pleasing edge. Bias Bound Seams are the same as Hong Kong Seams except that in the case of Bias Bound Seams, the edges of the bias tape are folded under and stitched down, hiding all raw edges. But for Hong Kong Seam the raw edge of the bias tape is left visible on one side.
Applications of Bias-Bound Seam
Garment Construction: Commonly used in high-end garments like jackets, dresses, and tailored outfits to reinforce seams while adding a polished interior appearance.
Home Décor: Applied in finishing edges of curtains, pillowcases, and table linens to provide durability and an elegant touch.
Specialized Apparel: Frequently used in sportswear or activewear for its smooth finish, which reduces chafing and increases comfort.
Accessories: Suitable for bags, pouches, and other crafted items to create a professional and refined look.
Outerwear: Ensures durability in coats, jackets, and blazers, particularly for seams exposed to wear and tear.
Self Enclosed Seams
Self-enclosed seams contain all seam allowances within the finished seam, thus avoiding the necessity of a separate seam finish. This type of seam can benefit sheer fabrics, unlined jackets, and garments that will receive rugged wear or much laundering. Having the seam allowances tucked away in the seam can help prevent undue wear and tear on the fabric and create a neat, professional finish.
Proper trimming and pressing are important steps when creating a self-enclosed seam if the resulting seams are to be sharp and flat rather than lumpy and uneven. If the seam allowances are not trimmed properly and the seam is not pressed correctly, the result may be a lumpy seam that will not lie flat, which can ruin the finished look of the garment. Precise stitching is also essential.
Following are the types of seams under this category.
- The French seam
- Fat felled seam
- Mock French seam
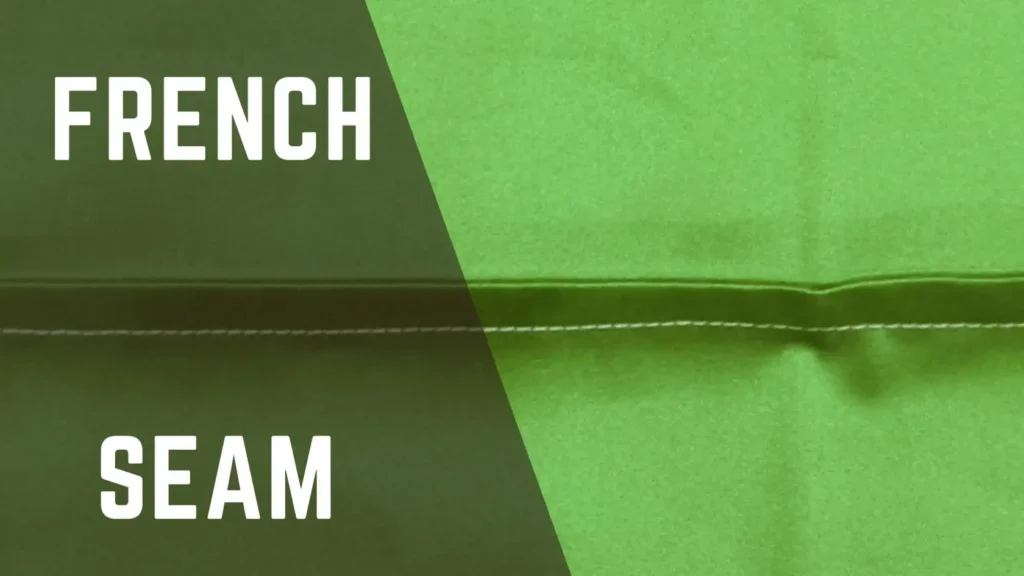
French Seam
The French Seam is a type of seam finish technique that produces a neat and secure finish. It is created by folding the fabric inward so the raw edges are hidden within a cage-like seam. This technique is ideal for thin, sheer fabrics such as voile, organdy, and georgette as it will prevent the fabric from fraying. The finished seam consists of four layers of fabric, which may make it bulky, so it is best used for dainty garments and lingerie.
Use of French Seam
Delicate Fabrics: Perfect for lightweight or sheer fabrics like chiffon, silk, and organza, as it prevents raw edges from being visible or fraying.
Luxury Garments: Often used in high-end fashion and couture garments, where a refined, professional look is required both inside and out.
Garments with Transparent Materials: Ideal for garments like blouses, dresses, or lingerie, where the inside of the garment may be visible.
Home Decor Projects: These can be used in projects such as curtains or cushions, where a polished interior finish is desired.
Mock French Seam
A Mock French Seam, also known as False French Seam, is a simplified version of the traditional French seam, designed to achieve a similar clean finish on the inside of a garment with fewer steps. Unlike a true French seam, which fully encloses the raw edges by sewing twice, the mock French seam involves stitching the raw edges together first, then folding and stitching them down to create a clean finish. This technique is often faster and easier to execute while still delivering a polished look.
Flat Felled Seam
A Flat-Felled seam is a durable and professional seam finish that encases raw fabric edges within two folds of fabric, providing a clean, polished appearance on both sides. This seam is created by sewing the fabric’s wrong sides together, trimming one seam allowance, folding the larger allowance over the trimmed edge, and stitching it flat.
Applications of Flat-Felled Seams
Purpose: Flat felled seams offer a durable and polished finish, making them ideal for both functional and aesthetic use.
Key Applications:
Clothing:
Denim/Jeans: Widely used in denim for a sturdy construction and classic appeal.
Sportswear/Activewear: Ensures smooth interiors that prevent irritation during movement.
Shirts: Commonly used in side seams and sleeves for a clean, professional finish.
Home Décor:
Bedding: Adds strength and neatness to seams in sheets and pillowcases.
Duvet Covers: Reinforces seams for long-term durability and a polished look.
Mock Flat Felled Seam
A mock flat felled seam is a kind of seam that mimics the appearance of a traditional flat felled seam but with a simplified, less bulky structure. Unlike a true flat felled seam, which requires multiple layers of fabric to be folded and stitched for durability, the mock flat felled seam involves sewing two fabric pieces together, overlocking the edge, pressing the seam allowance to one side, and double topstitching along the edge.
This method creates a neat, professional-looking seam on the front while reducing bulk on the back, making it ideal for heavier or thicker fabrics. Watch the video to understand the method.
Use of Mock Flat Felled Seam:
Heavyweight Fabrics: Ideal for fabrics such as denim, canvas, or upholstery where a sturdy seam is needed without adding unnecessary bulk.
Casual Garments: Commonly used in garments like jeans, shirts, and jackets, where durability and a clean finish are important but a quicker sewing process is preferred.
Home Decor Projects: Often used in sewing home décor items like cushions or curtains, where a strong, neat seam is needed without overwhelming the fabric thickness.
Top Stitched Seam
A Top Stitch Seam starts with two fabrics being stitched together from the wrong side as a plain seam. The seam allowances are then pressed to one side (unlike an open seam where they are pressed to both sides). A visible stitch is made through all three layers: the main fabric and the two layers of seam allowances, typically at a distance of 1/16 inch from the edge. The process involves backstitching at both the beginning and end for reinforcement. This technique creates a durable and sturdy seam, often used for work clothes, providing strength and aesthetic appeal.
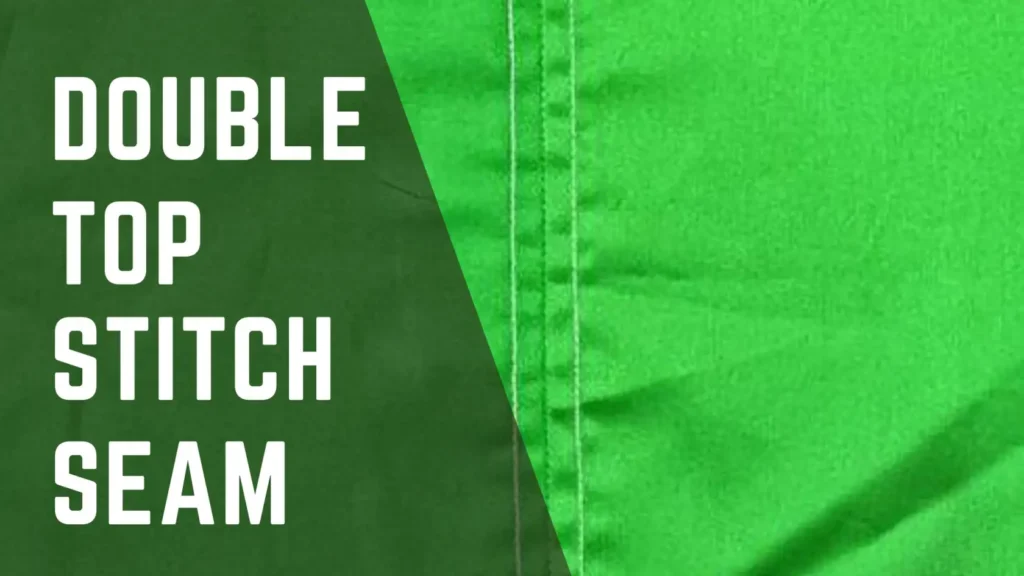
Double Top Stitched Seam
A double-stitched seam or double top-stitched seam is a type of seam where the fabric is first sewn together and then pressed open. After pressing, a stitching line is sewn on each side of the seam line, running parallel to it. This stitching goes through both the garment fabric and the seam allowances, helping to keep the seam flat. This type of seam is often used to highlight a construction detail, adding decorative stitching that enhances the look of plain fabric while also strengthening the seam.
Stitched and Pinked Seam
A Stitched and Pinked Seam is a type of seam finish technique. It involves cutting the fabric edge with pinking shears (special scissors with serrated edges) to create jagged edges. Before pinking, a running stitch is sewn ¼ inch from the raw edge to prevent raveling and to prevent the seam from curling, especially in fabrics that ravel slightly. This technique is widely used in home sewing and mass production. It is considered a quick and easy seam finish, ideal for firmly woven fabrics.
Eased Seam
An eased seam involves drawing in or easing a longer section of a seam line on one piece of fabric to fit a corresponding shorter section on another piece. This process helps create a smooth fit without visible gathers or pleats. It is typically achieved by using a basting stitch to gather the longer piece slightly before sewing it to the shorter piece.
Applications of Ease Seam in Garment Construction:
Necklines and Elbows: Eased seams replace small darts in necklines and elbows, offering a smooth fit while controlling fullness.
Buntlines and Waistlines: These match waistlines or distribute fullness at the waist in skirts and bodices.
Back Sleeve Seams at the Elbow: Easing allows for better fit and movement around the elbow area.
Princess Line Garments: Eased seams are often employed on outward curved seams of the side front panels to ensure a flattering fit.
Shoulder Fit: Used to match the back shoulder to the front, ensuring the garment aligns correctly across the shoulder seam.
This technique is vital for controlling fit, distributing fullness, and achieving a more comfortable, streamlined appearance in various garment sections.
Gathered Seam
A gathered seam is a sewing technique used to create a bunched or ruffled effect by shortening a longer fabric strip to fit a shorter one. This is achieved by sewing two parallel lines of long stitches along the edge of the longer fabric piece and then pulling the threads to gather the fabric. The gathers are evenly distributed, creating a smooth, controlled fullness that can be incorporated into a variety of garment parts.
Application in Garment Construction:
Gathered seams are commonly used in garment construction to add volume or texture to specific areas of a garment. This technique is frequently seen in:
Skirts and Dresses: To create a flared or A-line silhouette.
Sleeves: To add puffiness or fullness to sleeve cuffs or caps.
Necklines: To gather the fabric around the neck area for decorative or fitted purposes.
Waistbands: In garments like skirts or dresses, where gathers can provide a more fitted, elasticized look.
The gathered seam is versatile in creating feminine and voluminous designs and is often used in lightweight fabrics like cotton, chiffon, or silk to enhance the garment’s structure and appeal.
Conclusion | Different Types of Seams in Sewing
Congratulations! You’ve explored the world of seams, from the basic plain seam to advanced techniques like the Hong Kong and bias-bound seams. These seam types are essential for creating strong, durable, and beautifully finished garments. Now it’s your turn to practice these techniques at home and apply them to various sewing projects, whether it’s creating delicate blouses or sturdy jeans.
But your learning doesn’t stop here! Seams are just the beginning. Dive deeper into the art of garment construction by exploring other techniques like darts, tucks, plackets and pleats. Curious about these? Don’t worry—we’ve got blog posts to guide you every step of the way. Keep sewing, keep learning, and bring your creative visions to life!
The Ultimate Guide: What Are Pleats? Exploring the Top 10 Types of Pleats in Fashion and Home Décor!
If you are interested in joining a tailoring course, you can join from anywhere in the world. We provide live online classes starting from basic tailoring courses to advanced tailoring courses.
