When to Use Facings in Garments
- Necklines without collars
- Armholes in sleeveless garments
- Waistband-less waistlines
- Any areas with raw edges that require reinforcement and finishing
Benefits of Using Facings
- They give clothes a professional, polished look
- They add stability and structure to important areas
- They help the clothes fit better and look more shaped
- They make the clothes less bulky where a full lining isn’t needed
- Facings make edges look clean and crisp, especially in clothes without collars or sleeves.
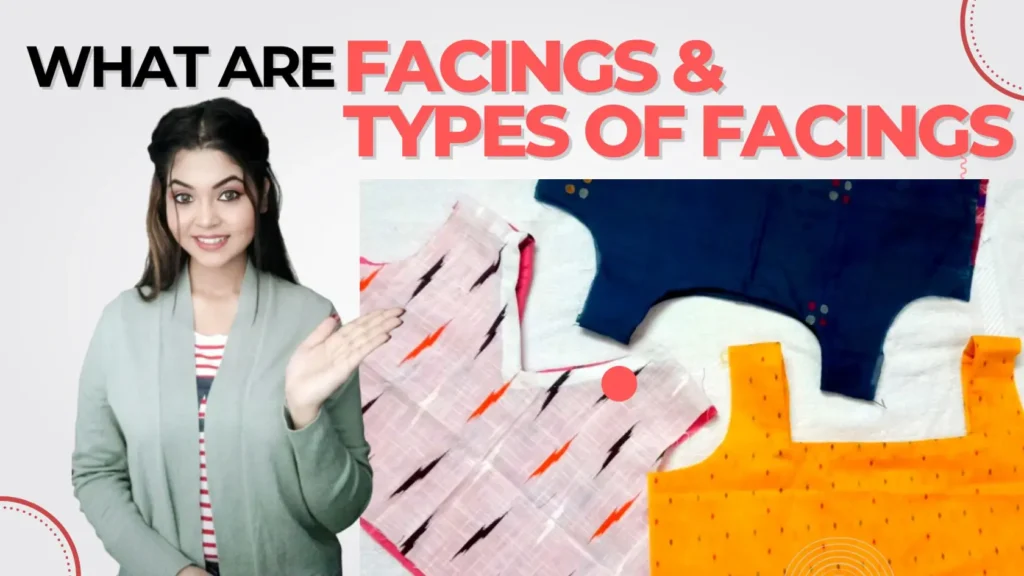
Types of Facings
There are three main types of facings
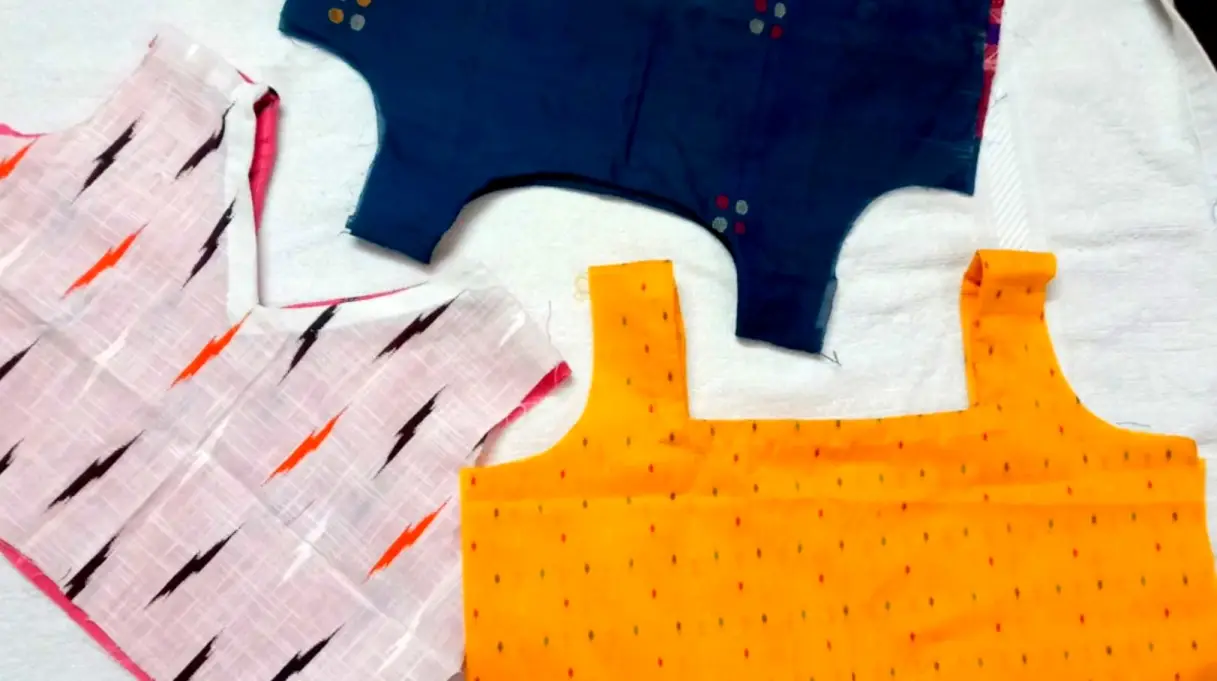
Shaped facings
A shaped facing is a custom-cut fabric piece designed to match the contours of a garment’s edges perfectly. These facings are created by tracing the specific outline of the garment, making them ideal for finishing curved or intricate areas like necklines and armholes. They provide a seamless, polished look while maintaining the garment’s original shape and structure.
Shaped facings can look great but come with challenges. One issue is the facing rolling outwards. This can be fixed with proper understitching and the right interfacing. Another problem is bulk, which can be reduced by careful grading and clipping. Knowing these solutions helps achieve a smooth finish.
Note: Please note that facing and interfacing are different. Facing is visible. However, interfacing is inside to give strength and durability to the garment. Interfacing generally has heat-activated adhesive on one or both sides. It is affixed to a garment piece using heat and moderate pressure, such as from a hand iron.
Extended Facings
Extended facings are fabric extensions cut as part of the garment pattern itself and folded back to finish raw edges. They are commonly used for straight-line openings, such as the front or back of a garment, offering a clean and streamlined finish. For curved areas like necklines, an additional shaped facing may be used to achieve a polished appearance.
Extended facings bring many benefits. They help keep the garment stable and prevent stretching. They also make the fabric look smooth and continuous. Adding interfacing to the facing or the garment body makes it even stronger. Extended facings are useful in many garments. They can be used for necklines, armholes, hems, and openings.
Bias Facings
Bias facings are narrow strips of fabric cut on the bias, or diagonal grain, to provide flexibility and a smooth finish to curved edges. Commonly used in sewing, they offer a lightweight and adaptable solution for finishing edges like armholes, necklines, and other curved areas, ensuring a clean and professional appearance.
To make bias facings, cut strips twice the width you want, plus seam allowances. This extra width lets us fold the facing in half lengthwise. Please note that the bias strips are always cut at a 45-degree angle with the grain line. If you are curious to understand what a grain line is with respect to sewing, we have a separate blog post for that.
How to Sew a Facing as a Trim Element
In the video below and subsequent process description, we will learn how to sew facings to different types of Necklines, such as Square necks, round necks, and V necks.
How to Sew Facing to a Neckline in Hindi
Essential Tools and Materials for Sewing Facings
Sewing facings requires a good set of tools. You’ll start with sharp fabric scissors, a sewing machine, and pins. First, pick the facing fabric. Based on your design, it should match or contrast with the main garment. Use fusible interfacing to add structure and stop stretching. Pick an interfacing that fits the weight and type of your fabric—like knit interfacing for stretchy fabrics.
- Sharp fabric scissors
- Sewing machine
- Pins
- Matching thread
- Fusible interfacing
- Optional: Serger or overlocker for clean edges
- Optional: Pinking shears for finishing raw edges
- Press Iron
A hot iron is key for pressing the facings in place. Also, use needles appropriate for your fabric—a universal needle for wovens and a stretch or ballpoint needle for knits.
How to Sew a Facing to Round Neck
Adding facings requires careful work and special techniques. Understitching is key to keeping the facing in place. Grading seams and tacking (using a tacking or basting stitch) facings at seams also help.
We have used two methods here.
Using Shaped Facing
Step 1: Creating Shaped Facing Patterns
To make a shaped-facing pattern, trace the garment’s edge. In this case, we will trace a fabric along with the neckline and cut a facing in the same shape and 1.5 inches in width. You can take more width to keep the appropriate seam allowance according to the garment you are making. This ensures a perfect fit and a professional look. When cutting, watch the grain direction to keep the shape right.
Step 2: Installing the Shaped Facing
Keep the right side of the bodice fabric upward. Put the shaped facing on it along with the neck, keeping the wrong side of the facing upward. Now stitch it at the edge with the appropriate seam allowance and fold the facing to the wrong side of the neck. But dont hem the facing on the other side as of now. Keep it open. You will hem it after step 3 is done. This is called understitching. To make it strong, do an edge stitch on the top of the seam line of the facings. An edge stitch is only a stitch as close as possible to the seam line. Noch the seam allowance using a thread snip at several spaces. You can watch the video above to understand the steps more accurately.
Install another shaped facing in the back part of the bodice in the same way.
Step 3: Attach the shoulder of both parts of the bodice along with the facing.
Step 4: Now, you can hem the facing on the wrong side of the garment.
Using Bias Facing
You can cut the bias strips diagonally from the fabric and attach two bias tapes to match the total circumference of the neckline. Sewing the bias tape along with the edge of the neck will be challenging as the bias tape is straight and the neck is rounded. To overcome this challenge, we pleat the facing whenever we move the neck around while sewing. It is better to watch the above video to understand this step. The rest of the sewing will be the same as shaped facing.
How to Sew a Facing to Square Neck
Shaped facing is easy in the case of a square neck. After attaching the facings, notch the corners. This is vital for professional finishing. If you use bias tape, cut three bias strips for a square neck. This is required to attach the ‘facing’ to three sides of the neck. All other methods are the same as the previous.
How to Sew a Facing to V-shaped Neck
Again, attaching a shaped ‘facing’ is straightforward. Start by tracing the neckline onto a piece of fabric and cutting it to match the edge. Ensure the facing is 1.5 inches wide, or adjust the width based on the seam finish design you plan to use after attaching the facing. For a bias strip facing, cut two fabric strips and join them to form a triangle shape. For a detailed demonstration, please watch the above video.
Understanding Grainlines in Facing Construction
Aligning fabric grainlines is critical when sewing facing fabric. Grainlines show the fabric’s thread direction, with warp threads going up and down and weft across. It’s vital to cut the facing and the garment on the same grain. This ensures the garment hangs and wears evenly. The bias strips must be cut diagonally at a 45-degree angle with the grain line for bias facing.
Importance of Proper Grain Alignment
Aligning the grainlines of the facing and the garment is crucial for several reasons:
- It keeps the fabric’s natural stretch and shape, avoiding distortion or twisting.
- Proper alignment makes the ‘facing’ and garment work together smoothly for a professional finish.
- Following the grain direction helps avoid fit and hang problems in the garment.
Common Grainline Mistakes to Avoid
Ignoring grainlines when cutting and pinning the facing is a common mistake. This can cause:
- Facings that twist or hang wrong because of uneven grain direction.
- Fabric distortion leads to a sloppy or unprofessional look.
- Getting a proper fit and shape in the finished garment is harder.
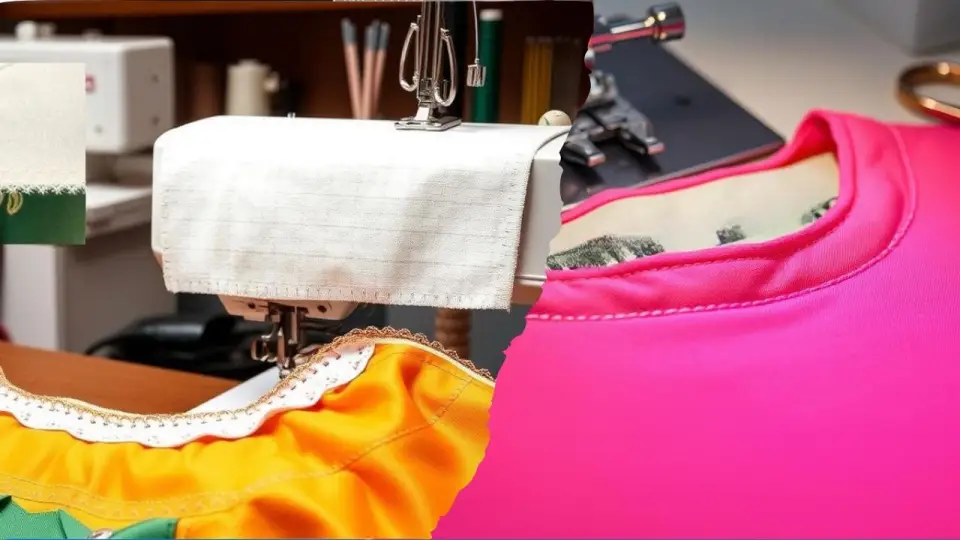
Finishing Techniques for Facing Edges
In sewing, facing means adding a second layer of fabric to the raw edge of a garment. This could be the neckline, armhole, or center front opening. It’s essential to finish facing edges well to get a neat look. There are many techniques, each suited for different fabrics and garment types.
Serging or zig-zag stitching the edges is a common method. It works well for thinner fabrics and gives a clean finish. The serging-and-folding method is used for light to medium-weight fabrics. It involves serging the facing and then folding it.
A bound-facing finish is best for thicker fabrics like coatings and suiting. This method uses a separate piece of fabric, called binding, to cover the edge. Adding double-folded binding can make the look even more polished.
- Hemming the edges is suitable for lighter-weight fabrics, like dresses and blouses.
- Pinking shears can give a simple finish to some fabrics. However, they might not last long in heavily used areas.
- You might not need to finish the edges for knit or lined garments. The facing will be hidden anyway.
It’s critical to avoid bulky finishes that could show through the garment. Good edge finishing makes the facing last longer and improves the garment’s quality.
| Finishing Technique | Recommended Fabrics | Key Benefits |
|---|---|---|
| Serging/Zig-zag Stitching | Thin, lightweight fabrics | Clean, durable finish |
| Serging-and-Folding | Light to medium-weight fabrics | Versatile, neat appearance |
| Bound Facing Finish | Heavy-weight fabrics (coatings, suiting) | Tailored, structured look |
| Hemming | Lightweight fabrics (dresses, blouses) | Simple, clean finish |
| Pinking Shears | Selected fabrics | Quick, basic finish |
Knowing about different facing edge finishing techniques helps sewers make professional-looking clothes. Choosing the proper method for the fabric and garment shows off their skills.
Under stitching and Its Importance
Understitching is key in sewing for a professional look. It involves stitching through the facing and seam but not the main fabric. This keeps the facing in place, preventing it from showing on the outside. It gives a clean, sharp finish.
Step-by-Step Understitching Guide
We saw how to understitch in the above section, ‘How to sew a facing as a trim element.’ We are again summarizing the steps below. Understitching is a basic sewing concept that is a must-have for any sewer.
- To attach the facing to the main fabric, place the facing or bias strip with its wrong side up while keeping the main fabric with its right side up. Then, stitch them together along the edge.
- Notch the seam allowance.
- Press the facing back, making sure the understitching is hidden on the right side.
- Do an edge stitching just beside the seam line from the right side of the facing.
Troubleshooting Common Facing Problems
Even experienced sewers face common challenges. We’ll examine these issues and offer solutions to achieve a professional finish.
Rolling to the Outside
When fabric rolls to the outside, it’s frustrating and makes the garment look bad. To prevent this, make sure to understitch well. Also, tack the facing at key spots to keep it in place.
Creating Bulk
Bulk can be a problem, especially with many layers. To fix this, grade the seams and pick the proper interfacing. A light, flexible interfacing helps keep things thin while still offering support.
Showing Through the Garment
For thin fabrics, the facing might show through. Use bias facings or a light facing material to hide it better.
| Common Facing Issues | Causes | Solutions |
|---|---|---|
| Rolling to the Outside | – Improper understitching – Lack of strategic tacking | – Ensure thorough understitching – Tack facing at key points |
| Creating Bulk | – Multiple fabric layers – Inappropriate interfacing | – Grade seams – Use lightweight, flexible interfacing |
| Showing Through the Garment | – Sheer or lightweight fabric | – Opt for bias facings – Use compatible lightweight-facing material |